Utlizing ‘AI’ Artificial Intelligence Software in the Hospitality Industry
Have you ever wanted more time and more help in your...
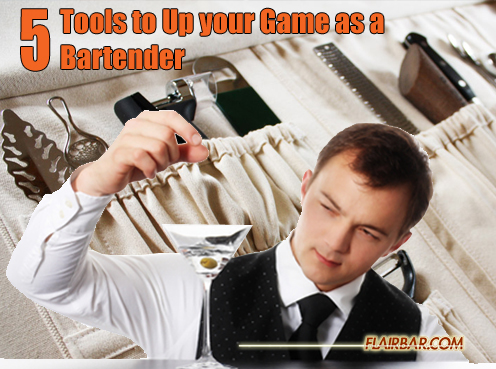
Whether you are a beginner bartender or a well seasoned pro… there is always room to learn more… to become better… to ultimately make you and your venue more money. We are going to show you 5 simple tools and how to use them to up your game as a professional bartender. First, realize you don’t know everything, second REALIZE IT’S OK and more importantly it’s ok to ask for help. Once you drop the ego and start to listen to other peers in your field about their success and failures, hopefully you will start to share your success and failures and we can all continue to learn from each other and continue to “raise the bar” of bartending further.
With that said, lets move onto the 5 tools every bartender can use to up their game as a bartender.
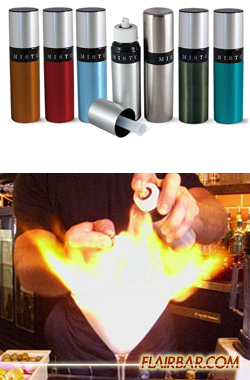 #1 Misto
This tool has been around for years. It started off in the back of the house and found its way to the front of the house with new applications. The “Misto” is a self contained container that you can fill up with any liquid and with a few pumps gives you a continuous mist of your liquid. Now how can you use this to up your game as a bartender? Answer… more then one way.
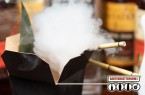
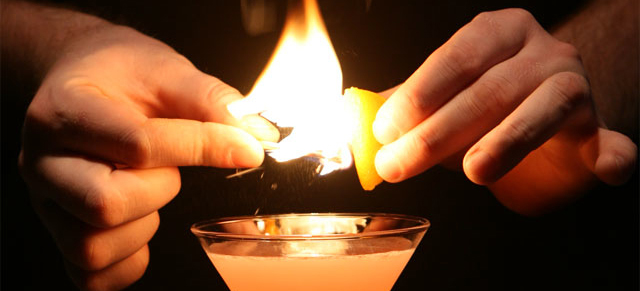
First, you can fill with the “Misto” with your favorite vermouth or absinthe and use the “Misto” to coat the inside of your cocktail glass to give your cocktail a slight flavor change without overpowering or over pouring to get your desired effect. Second, you can add bitters, tinctures or shrubs to finish your cocktail with give it a great new aroma to enhance your cocktail experience. Third… and one of my favorite, you can add a highly flammable spirit such as Bacardi 151 or Sambuca and with a common lighter you can create a mini flamethrower and have the ability to torch or brule desired items. Now you can torch cherries, rosemary, oranges, sage, cherries, etc… to create new smoked flavors to your cocktails or to caramelize the sugars of fruits or other items as you wish. Imagine grabbing the attention of every guest at your bar while creating a custom craft cocktail… Cha ching! that’s the sound of all of the money you will be making back on your small investment on your new set of tools to compliment your all ready growing set.
You can purchase your “Misto” by clicking HERE!
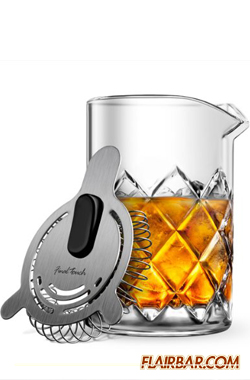 #2 Yarai Mixing Pitcher
Lets be real, almost every bartender has a mixing tin and either a cheater tin or glass to shake cocktails with. Hopefully you have a Hawthorne strainer to strain with… if not… it’s time to up your game. I give you the Yarai Mixing Pitcher that just screams elegance. Your metal mixing tins are more designed for shaking cocktails while the Yarai Mixing Pitcher is more designed for stirring cocktails. You would generally stir cocktails with a bar spoon and mixing glass not containing any juices of liquids that don’t need to be aerated. So think cocktails that are mainly all spirits like Manhattans, Martinis, Rob Roys, etc… Trust me, you instantly feel like a better bartender the minute you start to use this beautiful piece of bar art and your customers will appreciate it to. It will come to a point that you will come up with reasons and more importantly cocktails just so you can use it in your shift behind the bar.
You can purchase your Yarai Mixing Pitcher by clicking HERE!
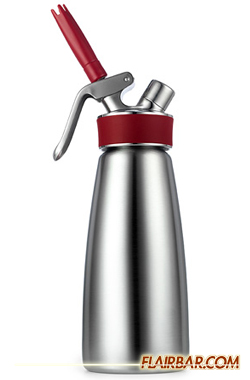 #3 Espuma (Cream Whipper)
You have probably seen this little gems at your favorite coffee shop or ice cream parlor. Now in the past years they have been utilized behind the bar to help implement some creative Molecular Mixology techniques. I have been using Espumas for years and it’s one of those tools that instantly ups your game as a bartender. Molecular Mixology is nothing new but to the common guests at your bar… it still is. So now is another chance to peek their interest while creating excitement at your bar with some new original cocktails.
Espumas have been used in the past for creating whip cream and different dairy delights… while you can still utilize this amazing tool to do just that and create your own flavored whip cream… why not take it a step further? You are going to utilize a Molecular Mixology technique and make an original flavored “foam” to top your cocktails with. The main difference between whip cream and foams is that foams generally don’t contain any dairy products, which is favorable for allergies and all of your guests at your bar counting calories. To create a foam you are going to change the texture of your liquid to a new texture of foam that will add another layer of flavor, aroma and texture to your cocktails.
Here’s how…
Non-Alcoholic Foam
Using nitrogen cartridges and an Espuma you can create a non alcoholic foam, we are going to utilize a recipe that I first utilized when I first started using foams. In a container combine 4oz pasteurized egg whites, 2oz fresh lemon juice, 4oz of any flavored syrup you like, 2oz Finest Call Bar Syrup and 6oz water. Stir ingredients until everything is blended, pour contents into your Espuma. Next twist on the lid nice and tight, give it a good shake, screw on the nitrogen cartridge until you hear the light sound of the “Hisssss” disappear. Give it one more good shake and refrigerate for an hour. After that hour, your new foam is ready to use!
Alcoholic Foam
Using nitrogen cartridges and an Espuma you can create an alcoholic foam, we are going to utilize a recipe that I first learned from Charles Steadman of the USBG Palm Beach Chapter. In a container combine 750ml of dry champagne (or your favorite spirit) and 1.5 tablespoons of powered gelatin (or 6 gelatin sheets). Stir ingredients until everything is blended then refrigerate until it becomes loose jello. Scoop contents into your Espuma. Next twist on the lid nice and tight, screw on the nitrogen cartridge until you hear the light sound of the “Hisssss” disappear. Give it a good shake for 20 seconds and your new foam is ready to use!
Foams are a great way to utilize Molecular Mixology in a high volume venue because most of the work is done ahead of time.
You can purchase your Espuma by clicking HERE!
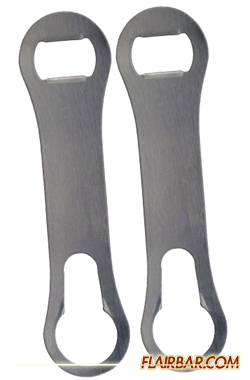 #4 V-Rod (Bottle Opener)
This one is short and sweet. Any bartender has a good bottle opener. Whether it is a flat speed opener, church key, vintage opener or your everyday lighter… we all utilize some tool to open bottled beer. With the V-Rod not only will you be able to open bottled beer very quickly but it serves another purpose behind the bar. How many times have you pulled a pour spout out of an empty bottle to transfer the pour spout from the empty bottle to the new full bottle you are replacing it with in your well. While 80% of the time this is generally a fast process… there are times that stubborn pour spout will not budge and release from the empty bottle. That’s right smile and flash back to the last time this has happened to you. We can smile now but during a busy shift, this can slow you down and lessen your appearance of a professional bartender as you attempt to wrestle with a piece of equipment you are to suppose to have mastered.
Well worry no more! With the V-Rod you can open bottled beers with one end and with the other end it easily helps you release stuck pour spouts from bottles quicker then you can grab a bar towel and flex those muscles to your bar guests while you are losing out on sales until you magically pull out Excalibar from the stone! Lol, seriously… buy one and you won’t regret it. If not for you, for all of the female bartenders you work with that keep handing you the empty bottles to remove the stuck pour spout while you are trying to make cocktails during your shift… you know it has happened before… ![]()
You can purchase your V-Rod by clicking HERE!
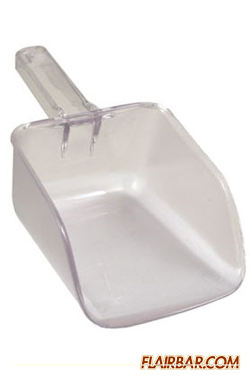 #5 Large Plastic Ice Scoop
How many times to you cringe when you see bartenders scoop ice with glassware? Not only is this very dangerous as that glass could chip off or worst yet break in your hand leaving glass shards camouflaged in your ice and your next cocktail you could be potentially serving to your guests. NOT COOL! So if you do it, stop it now. Secondly, if you use a mixing tin to scoop ice… at least that is a little better… unless you are using a powder coated mixing tin and have always wondered why your tins are all chipped up and missing paint. Where do you think all of those chips of paint went?… wait for it… Yes, in your guests cocktails you made for them! Ok, so you use metal non-powder coated tins to scoop your ice for your cocktails with. While this is the best of all of the situations described so far… it is not the best. Think about how many times you have to actually “scoop with your tin” to make a round of cocktails. On average, for three cocktails you will scoop three times. If you utilized a large plastic ice scoop, on average you would only scoop ice once for those three cocktails. Thus saving you time to serve more guests, cocktails, ring more at your register and ultimately MAKE MORE TIPS!
Whether you use a large metal or large plastic ice scoop is up to you. From experience I prefer utilizing a large plastic ice scoop due to the fact that you wont have to worry about grabbing a freezing cold metal handle or getting frost bite on a busy shift due to the fact that metal is a great conductor for heat and cold. Another reason I prefer plastic over metal is depending on the model of metal scoop you use… I have seen bits of metal chip off into the ice of some models of metal ice scoops. Keep in mind though, if you choose to use a large plastic ice scoop PLEASE KEEP IT CLEAN! I hate having the satisfaction of seeing a large plastic ice scoop behind a bar and then getting a closer look only to see mold and bacteria stuck in the corners and behind the handle. YUK!
You can purchase your large plastic ice scoop by clicking HERE!
Closing thoughts… “Take yourself seriously by taking your bar tools seriously.”
Cheers,
Rob Husted
![]()


Have you ever wanted more time and more help in your...

MANGO MAGIC: Marco Estrada, Brownsville, TX 1 ½ oz Aviation Gin ¾...

ALOE WOK: Olya Sabanina, Saint Petersburg, Russia 1 1/3 oz Aviation Gin...

We have all strived to become better at our craft, or else,...

About the author, Elton Marvin Jr. has worked in the food and...

From starting out picking up a Flairco bottle after watching the movie...

Click “Play” on the video above.

Click “Play” on the video above.

Click “Play” on the video above.
 Rating: 5.00